A Conscious De-Coupling

If you have purchased a 00 gauge model from any UK manufacturer in the past 50 or so years chances are it will have been fitted with a tension lock coupling. Chances are also good that you will have found this style of coupling fiddly and annoying. As operating my Inglenook layout is going to involve a great deal of coupling and de-coupling I needed to look for a better way.

After a bit of Googleing I have settled on Kadee Couplings. Kadee couplings are interlocking knuckles similar in appearance to the hook couplings seen on N gauge models. The way the couplings fit together makes it easy to de-couple stock as the required train or wagon can just be lifted off without the hassle of de-tangling that comes with tension locks and as an added bonus the couplings are magnetic so theoretically they offer hands free shunting. I bought a pack of Kadee number 18’s (as recommended by several internet forums) to test out on my stock and here is where to trouble starts.

Number 18’s are designed to fit into NEM pockets (small boxes that coupling fitting clip into) which is fine for stock that has NEM pockets but not so fine for stock that doesn’t. As it turns out NEM pockets are not standard equipment on model trains and its mostly down to luck if your model has them or not. Fair enough, I thought, Kadee also do couplings for models that have their couplings screwed directly to the model. This isn’t a perfect solution however as the height of the screw-in fittings varies and Kadee couplings are a little more reliant on couplings being the same height than tension lock couplings are. I’m not keep on making alterations to stock to fit the screw-in couplings so I’ll be sticking with the clip-in ones.

Overall I’m happy with the way the new couplings make coupling and uncoupling a lot less fiddly so I’ll slowly be changing over my stock as the inglenook layout progresses. Watch this space…

Ballast – One Way to Do It

Ballast is the small rocks that are laid in and around the railway line and is a common feature on pretty much any “real” railway you care to look at. “Real” ballast is there to stop the track from moving but on a model railway it is one of the most basic things needed to create realism. There are a lot of different methods to ballast a layout and I’m about to go through one of the less technical ones. For this example I’ll be ballasting my new N gauge layout but I have successfully used this method on 00 gauge lines before.

Firstly, layout your track as you want the final layout to appear but don’t fix it down. This is a good chance to get the look and operation of the track sorted so take advantage of it before moving on. When you are happy with the layout, draw an outline slightly wider than the track on the baseboard in pencil and then take the track up. It’s a good idea to take a picture or draw a diagram of the layout before you remove the track so you know where everything goes when it comes time to put the track back down.

Next, get some paint that is a slightly darker shade than the ballast you will be using and paint everywhere inside the pencil outline you have drawn. You the amount of paint you need will vary depending on the size of your layout but I get by with decorating tester pots from my local DIY store. They are only about £1 each and one pot was enough to cover the whole layout.

Once the paint is dry, get some PVA glue and cover the painted area in a layer of glue. You may want to avoid doing this in hot weather or in strong sunlight as the glue will dry to quickly to apply any ballast. Also, for larger layouts its best to apply the glue in sections so it doesn’t dry before you can get ballast on it.

IMG_20170830_111406393

Now that the glue has been applied, immediately apply the ballast. Ballast can be sprinkled out of the bag it came in or you can use a spoon or similar to sprinkle it over the glued area. Ballast comes in all shapes and sizes an its up to you what you use. For this layout I have used a fine grade of ballast specifically for N gauge layouts. Once the glued area has been completely covered in ballast leave it for a good 24 hours for the glue to dry completely.

IMG_20170830_111410654

When the 24 hours are up come back to the layout, the glue will be completely dry now but there will be excess ballast on the top of the layout. If the layout is small enough you can simply tip it over and the ballast will fall of with a few gentle taps. If the layout is too large or fixed down you can brush the ballast off using a stiff paintbrush or similar. This will make a mess so do it outside if you can or if not use a vacuum cleaner or cover your working area with newspaper. What you do with this spare ballast is up to you but if you want to reuse it be aware it may have been contaminated with things like pet hair or dirt and won’t be of the best quality anymore.

When you are happy with the ballast, put your track back on top of it and fix it down. That’s all there is to it, look out for future posts where I’ll be covering another method that is a little more involved but gives a more realistic looking result.

IMG_20170909_105711317

Tank Engine Conversion

DSC_0060_1

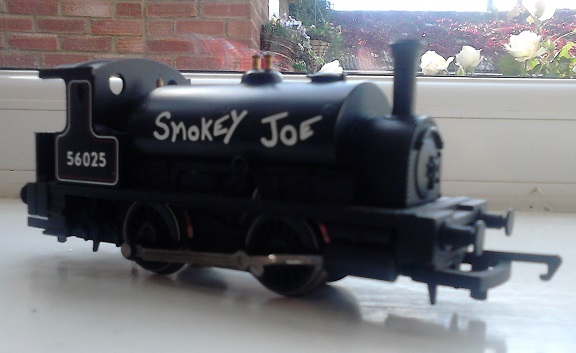
You may be familiar with Hornby’s 0-4-0 tank engine “Smokey Joe”, it’s a good little model and pops up on all kinds of layout. For me, it does have one problem – the words “Smokey Joe” graffitied on the engine’s sides. Now graffiti may be true to life (indeed, on a recent train journey I passed a rake of mineral wagons where every single one had been “tagged”) but it’s not something I want on my locomotives. With that in mind I went to work improving the paintwork.

I didn’t think the chassis needed any work so I removed “Joe’s” body and set aside the chassis for later. The body on this model is quiet easy to remove, a firm but careful pull and it comes right off. As the words “Smokey Joe” are slightly raised from the rest of the body they would need to be removed otherwise they would show through after painting. I tried using sandpaper to do this and I wouldn’t recommend this. Sandpaper is to rough and I ended up with tiny scratches on the model. Railway modelling magazines recommend using T-Cut or similar to remove details so if you are planning your own project invest in this instead. After this small disaster I removed the whistle as I didn’t want this painted and I covered the chimney and top and inside of the cab in masking tape. “Joe” was now ready for painting.

For the paint I went with green enamel spray paint from Halfords. This paint is meant for touching up car paint work but it’s good for modelling too. If you don’t have or don’t like Halfords I imagine spray paints for plastics from any other supplier will do just fine. Use spray paint outside wherever possible. I went with one liberal coat all over and was satisfied with the result. As an added bonus the thickness of the paint concealed the small scratches left by the sandpaper. Once the paint was dry the body was reattached to the chassis.

Wanting to add some extra detail I ordered up name and number plates from Narrow Planet. Narrow Planet makes the plates out of brass to order and prices are reasonable enough. The only thing is delivery can take some time as they only make the plates when they have enough orders so plan in advance if you are going to use them. When the plates arrived I used super glue to attach them to “Joe”. The name and number are in relatively the same place on each side, I didn’t have any guides to work from so placement was guesswork.

All that was left was to glue in the plastic crew as supplied with the model and paint them. I’ve glued them in but they are still waiting for paint. I haven’t weathered the model, I only have weathering powders at the moment and I don’t think they will stay stuck on to enamel paint very well. With the conversion as finished as its going to get for now private owner engine No. 1 Mio is ready for duty.

IMG_20170826_114555537

The Other Layout(s)

IMG_20170812_132152202Thanks to some re-decorating work in my house the inglenook layout is on hold for the moment. I do however have a new project. Something of a rarity, it includes both N and 00 scale running.

When I first started building layouts I had a large 00 circuit based on one of Hornby’s track mats. This worked well and gave me many years of enjoyment even though I never got around to adding some finishing touches. A few years ago I started to model in N gauge as well as 00 and having no room for another layout the one I did have would need to be scaled back. The 00 layout ended up half its former size and I now had two layouts, both 3’ x 4’, one in each scale.

This worked Ok for a while, the N gauge never got further than ballasted track with a few card buildings and the 00 gauge only progressed to the nearly finished stage because it was built on the baseboard of its predecessor. After a while I got bored with the 00 layout. It was too small and as the track was only two circles that didn’t even join together it didn’t offer much in the way of operational enjoyment. I wanted a bigger 00 layout again but this would mean getting rid of the N layout. Or did it?

I remembered an article I had seen on split level layouts that used the difference in level to show different locations or, more importantly, different scales. It was with this idea I set to work. Using the massive plywood offcut from the inglenook layout I made a new baseboard measuring 5’ x 3.75’ it is on this I have set down a new 00 plan. When finished, it will have two circles of track and trains will be able to cross freely between them thanks to some point work. I have made provision for a station, something the last layout didn’t have, and there is a siding for the station pilot.

In the middle of the baseboard, where others would either cut a hole for the operator to sit or cover in scenery, I have sited a raised baseboard where I had planned the N gauge layout to sit. I haven’t fixed this raised area down, the plan was to leave it detachable so it could be lifted off and used on its own elsewhere. After having tested this I have realised it’s too heavy to be practical and visions of smashed stock and scenery should I drop the board were enough to persuade me I need to re-site this board somewhere more practical. I’m thinking of putting it on one of the ends.

Watch this space for more news of both the new double level experiment and the inglenook layout.

Pacific Power

IMG_20170729_112612804

I was visiting my local model shop the other weekend and I spied a 00 gauge A4 Pacific fitted with DCC and sound for under £110 pounds. This was surprisingly cheap for a model fitted with sound but as payday was a distant vision I had to pass.

However…

I now feel the need to add an A4 Pacific to my roster of locomotives. For those of you new to the world of trains, an A4 Pacific is the model of engine that Mallard is. Along with the Flying Scotsman, Mallard is probably one of the most famous steam locos in the world and holds the steam locomotive speed record at 126mph. There are only five A4s left and you can Mallard at the National Railway Museum in York, England. The more I research this particular class of locomotive the more I want one of my own.

The thing is I’m being a bit picky about the livery. I’ve decided to go with British Railways in the last days of steam, this allows me to run all kinds of steam locomotives and gives me an excuse to throw in a few early diesels and electrics as well. Ideally I’d like to run an A4 in austerity era black but most ready to run A4’s are in LNER livery. This might not be a problem for a bold or experienced modeller who would get to work with T-Cut and airbrush but for me any locomotive is a bit of an investment and pulling it apart and altering it is a bit of a risk. I’ll have to be patient and hope that someone somewhere decides to release a black A4 with BR insignia, failing that I’ll have to trawl that well known auction site or just be a bit less picky – I have seen some respectable looking A4’s in Brunswick green.

Dapol Wagon Review

Last weekend, on my holidays, I visited the Mid Suffolk Light Railway which is Suffolk’s only standard gauge heritage railway. It’s a very good railway and I recommend it if you are out and about in the East of England. The gift shop there sells 00 gauge wagons with local owner details on the side. Shopping there I had the choice of wagons with Peterborough, Chelmsford or Mid Suffolk on the side, I opted to buy the latter for my Layout.

The wagon is of the four plank variety and made by Dapol. Price wise it is the same price as you would expect from any other wagon from any other supplier. Having briefly run it around a layout it performs with no problems. It has the usual tension lock couplings fitted in NEM pockets which should make it easy to swap them out if needed and it will be needed as after photographing it for this post the hook part of one of the coupling promptly came lose.

It’s fitted with a coal load that looks a little unconvincing up close but luckily it’s removable so I plan on replacing it with the real thing at some point. Removing the coal load was a little difficult and I was worried about damaging the truck at some points but it came out with no disasters eventually. Once the coal load was removed the slightly rough texture of the truck interior shows that it was manufactured using 3D printing, this doesn’t show on the outside so it’s not a big detractor for me.

The Mid Suffolk lettering on the side is clean and doesn’t look like it will peel off any time soon. According to the Mid Suffolk Light Railway website the lettering is true to prototype but having not seen the prototype i’ll take their word for it.

Overall it’s a standard wagon with no major detractors and the localisation offered by the lettering adds a nice touch. I give it a thumbs up.

In the future I plan on weathering the model and making a more convincing coal load for it. Once that’s done I’m planning on swapping out the couplings for something better. Look out for how I get on in future posts.

Additionally, Model Rail magazine (other model railway magazines are available) are doing a special issue on small space layouts this month so take a look if my explanation of inglenook puzzles in a previous post has whetted your interest.

A Word on Baseboards – Measure Twice, Cut Once

One of the golden rules of building a model railway is “Have a decent baseboard from the start”. Unfortunately due to my make do and mend attitude I didn’t follow this rule. My base board is made of a thin sheet of hardboard, one of the most awkward materials I have ever worked with. Hardboard warps easily, is very difficult to nail track pins into and any holes drilled through it will not be tidy. For these reasons I have taken up the existing baseboard and replaced it with a sheet of 9mm plywood. Much better. I’ve gone with 9mm ply because it appears to be the material of choice for experienced modellers; if it’s good enough for them it’s good enough for me.

One downside to replacing the baseboard is that the layer of cork I had on the hardboard could not be transferred over so I have laid the rails directly onto the Ply. This may make running louder but because of the nature of the layout operational noise was not a big issue in the first place. However, if possible I would recommend a cork underlay as it can be trimmed to add a bit of a “shoulder” to ballast and slightly raise the track above the rest of the scenery. As I’m going for a shunting yard with a slightly industrial feel I’ve gone without cork on this occasion.

One other challenge I faced was that the frame the baseboard was to mounted on wasn’t straight. I knew the edges of the ply were straight because they had been cut at the timber merchant using their precision tools. My eventual solution was to partially dismantle the frame and fix it to the baseboard piece by piece. This revealed that one of the edges of the frame was longer than the other three causing the whole thing to be crooked and preventing the two halves of the baseboard from lining up flush.

To sum up:

  • Don’t use hardboard as a baseboard. 9mm ply is what the experts advise.
  • Try to put a layer of cork on your baseboard, it can enhance the scenic aspect of the line and it is a good noise absorbent.
  • Make sure the frame you put your baseboard on is square. Measure twice, cut once as they say.

So, what is an Inglenook Puzzle?

An Inglenook Puzzle is a shunting layout that while simple can give hours of shunting entertainment. The unaltered version is a single track that splits into three sidings, two sidings are long enough for three trucks or wagons and the other siding is long enough for five trucks or wagons. The layout operator has eight trucks or wagons set up in the sidings, five in the long siding and three in one of the short sidings with the final short siding being left empty. The operator then chooses a random selection of five trucks or wagons and shunts the rolling stock into that order thereby making a train ready for the main line.

There are many variations on the shape of the sidings to the criteria for shunting stock. My own layout has been modified to allow for a double track engine shed and while this does not add any challenge to the shunting it gives me a place to store and show off extra engines. Variations on the rules of shunting can include adding a brakes van that must always go at the end of the train or putting a goods shed on the line that the engine must not pass through.

As I enjoy seeing trains of all types running I have only loosely decided to run engines from the British Railways transition period and I haven’t set a specific region so as not to tie myself to any particular rolling stock. While I’ll aim to run mostly British Railways steam engines I have a collection of trains from all regions and eras so you might see some unusual running combinations towards the end of the build.

About

A blog about 00 and N model railways. Some posts will focus on my attempt to build a small space railway and others will focus on reviews and other things of interest. Updated every two weeks.

Getting Started

A small bit of space opened up in my house recently and I jumped at the chance to fill it with a railway. The new layout would have to be long and thin so a circular layout was out of the question and I wanted it to be portable so I could use it outside in the warm weather.

I model in both 00 and N gauge and for this layout I opted for 00 as I have a larger collection of trains in this scale. I decided to run on analogue control rather than digital as most of my trains either pre-date digital or don’t have the space for a decoder. For the track plan I went with a simple shunting arrangement known as an Inglenook Puzzle with a slight modification to fit a double road engine shed. The finished plan is roughly six feet long by just over one foot wide.

For the baseboard I spied a wallpaper decorating table at my local home store. It has a plywood frame, folds in half and has legs the fold into the frame. Unfortunately the surface of the table is made of a thin sheet of hardboard, I would not recommend it for a baseboard as it is serious headache trying to nail trackpins into it. I’m not close enough to any DIY stores or timber merchants to source a different type of wood so I’ve had to make do and mend. The table was twice the width I needed and after a handy bit of sawing and drilling I was able to cut it down to size and I finished it off by covering the top with a thin layer of cork.

One the cork was down I laid out the track to see how it will fit on the table. After a bit of manoeuvring I was able to line up the track so the joins were over the gap in the table where it folds in half. This done I marked out where the points were going to go and then took up the track so I could paint the areas under the points with grey paint. The reason for this that I’m going to try my hand at ballasting the track after it has been laid, a first for me, and the grey paint should cover up where there cannot be ballast due to the operation of the points.

When I was happy with this I nailed down the main trunk of the track and added some bridging wires where the table folded in half. As a next step I’ll be looking to add some point motors and then possibly move on to ballasting the line.